Hello lovelies!
Happy Friday! There has been for a time since I did not share DIY tutorial with
you all. You can check here to view the last DIY project. And today when I see
this lovely project on Sheknows, I can not help sharing with you all.
The DIY
hand-painted wood bead necklace tutorial will allow you to have a piece of
beautiful accessory in your accessory collection. It will add sweet touch and
stylish feeling to you in a quick time. Meanwhile, you can also play with the
colors as you like. So things will end that you got lots of possibility of
look.
Before the getting
started, there are some materials needed. The list are as below:
1. Craft paint (the color choices in this
tutorial are blue, fuchsia, orange, yellow, and grey. You can also choose as
your preference)
2. paintbrush
3. 10 1-inch wood beads with predrilled holes
4. painters tape
5. necklace chain

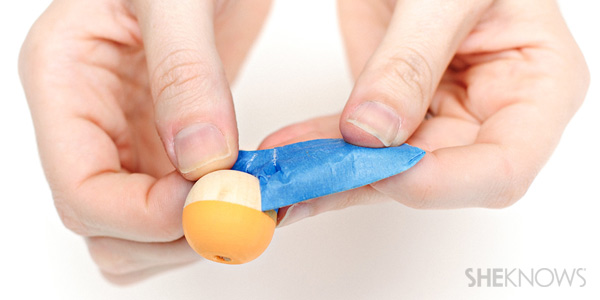
After the material
is getting down, we can come to the tutorial guide. First step: Tape off half
of the bead with exactly half of the bead showing. The other beads are the
same.

The second step:
use the paintbrush to paint the exposed side of the bead while leaving the hide
part in blank Paint the same color for 2 beads, so you can get five colors with
10 beads.

The third step:
wait until the paint is dry, Then you can peel the tape off carefully. So the
beads are almost got ready.
The forth step:
line up the pained beads in the order that you want them on your necklace. You
can have various combinations as you like of course. The order below is just an
example.

The finishing
step: string the painted beads into the chain. In order to make a organized
color scheme, make sure making the two color sides meet.


Then you got the
beautiful necklace wit these easy steps. Like it?

No comments:
Post a Comment